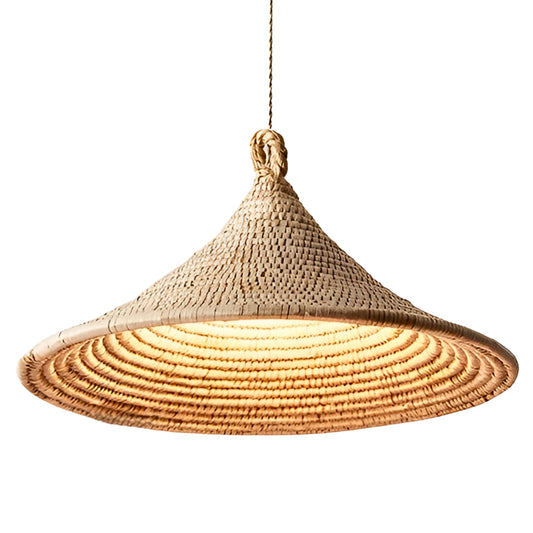
Room-by-Room Size & Placement Formulas
Standard Size Bands
| Band |
Diameter (in / cm) |
Quick Application |
| Mini |
7″ – 10″ (18 – 25 cm) |
Sink task light, tight powder rooms, multi-pendant cluster. |
| Small |
10″ – 16″ (25 – 40 cm) |
Hallways, bedside pendants, 3-cluster on small islands. |
| Medium |
16″ – 24″ (40 – 60 cm) |
Best seller: Kitchen islands, bedrooms, round dining tables. |
| Large |
24″ – 31″ (60 – 80 cm) |
Dining tables (6-8 seats), living room center, tall foyers. |
| Oversize |
32″+ (80 cm+) |
Double-height vaulted ceilings, commercial, statement pieces. |
Room-by-Room Recommendations
- 5 ft Island (150 cm): 1 Large (16″–18″) or 2 Small (8″–10″) spaced 24″ apart.
- 6 – 7 ft Island (180–210 cm): 2 Medium (12″–16″) centered, spaced 26″–30″ apart.
- 8 – 10+ ft Island (240–300 cm): 3 Medium (14″–18″) spaced 28″–32″ apart.
- Height: 30″ – 36″ (76 – 91 cm) from countertop to bottom rim.
- Round Table (36″–48″, 2-4 seats): 1 Medium pendant (16″–22″ / 40–55 cm).
- Rectangular Table (72″–84″, 6-8 seats): 1 Large (24″–28″) or pair of Mediums (14″–18″).
- Long Table (96″–120″, 8-10+ seats): Pair of Large fixtures (22″–26″) or linear 3-pendant row.
- Rule: Keep shade diameter ≥12″ narrower than table width to prevent knocking heads.
- Center Room / Above Bed: Standard bedroom (<120 sq ft) fits 16″–20″; Master bedroom fits 22″–26″. Bottom rim should be ≥4.5 ft above mattress.
- Bedside Nightstand Drops: Hang a pair of Small pendants (8″–12″ / 20–30 cm) suspended 14″ – 20″ (35 – 50 cm) above nightstand to free up table surface.
- Standard 8–9 ft Ceilings: Choose 24″–28″ diameter, hung directly over coffee table. Maintain at least 7 ft floor clearance in walking paths.
- Vaulted / High Ceilings (10–12+ ft): Large or Oversize (28″–36″+) creates a stunning visual anchor.
- Narrow Hallway / Standard Foyer: Small diameter (10″–14″ / 25–35 cm) or Semi-flush mount.
- Double-Height Foyer: Large 24″–32″ statement pendant centered with door transom.
- Safety Rule: Must maintain ≥ 7 ft (2.1 m) floor clearance so inward-swinging doors clear easily.
💡 Artisan Rattan Tip: Because our rattan shades feature open, airy handwoven patterns, they feel visually lighter than solid metal fixtures. You can safely size up by 10–15% without crowding your space!
Installation Manual & Wiring Steps
📦 What's in the Box?
View components, weight & warranty for this product:
Recommended Hanging Clearance
| Location |
Clearance |
Key Placement Rule |
| Kitchen Island |
30″ – 36″ (76–91 cm) |
From countertop surface to bottom rim. |
| Dining Table |
30″ – 34″ (76–86 cm) |
Centered over table; fixture is ≥12″ narrower than table. |
| Bedroom (Bedside) |
14″ – 20″ (35–50 cm) |
Above nightstand; frees up table space. |
| Bedroom (Center) |
≥ 7 ft (2.1 m) or 4.5 ft above bed |
Full head clearance when getting in/out of bed. |
| Living / Entry |
≥ 7 ft (2.1 m) |
Walking clearance for all family & guests. |
Step-by-Step Installation Process
Select your mounting option below for detailed steps:
⚡ Hardwired Standard: Pre-wired E26/E27 ceramic socket, UL-listed. Dimmable with compatible wall dimmer switch.
1
Safety Preparation & Power Cut
- Flip the main circuit breaker controlling the junction box to OFF.
- Confirm power is dead using a voltage tester before touching any wires.
- Prepare tools: Phillips screwdriver, wire stripper, pliers, and step ladder.
2
Mount Ceiling Crossbar Bracket
- Attach crossbar bracket to your ceiling junction box using the 2 provided screws.
- Ensure crossbar is aligned horizontally with your table or island layout.
- Tighten firmly until crossbar holds flat against ceiling with zero wobble.
3
Adjust Hanging Cord Drop
- Loosen the strain relief nut located under the ceiling canopy.
- Slide the 1.5m cord through canopy to set your desired hanging height.
- Re-tighten strain relief firmly to lock cord in place.
4
Connect Electrical Wiring (UL Code)
- Live connection: Twist Black fixture wire to Black house wire with wire nut.
- Neutral connection: Twist White fixture wire to White house wire with wire nut.
- Ground connection: Fasten copper/green wire to bracket grounding screw.
- Wrap each wire nut with electrical tape and tuck neatly into junction box.
5
Secure Canopy, Fit Shade & Test Bulb
- Push metal canopy flush to ceiling and tighten side decorative screws.
- Unscrew socket collar, fit rattan lampshade over socket, and tighten collar firmly.
- Screw in E26/E27 LED bulb (Max 60W). Restore circuit power and switch on!
🔌 Plug-in Convenience: No hardwiring or junction box required! Perfect for renters, high ceilings, or swag hanging anywhere near a wall outlet.
1
Plan Swag Hook Anchor Points
- Locate the nearest standard 110V/220V wall outlet.
- Mark 2 ceiling points: Point A directly above hanging spot, Point B near wall corner.
2
Install Ceiling Swag Hooks
- For drywall: Drill pilot holes and insert provided spring toggle anchors.
- For wood: Screw metal hooks directly into ceiling until firmly seated.
3
Drape Cord & Attach Shade
- Thread cord through hooks, creating an elegant natural swag curve.
- Unscrew socket ring, fit rattan shade over socket, and tighten collar.
4
Screw in Bulb & Plug In
- Install an E26/E27 LED bulb (Max 60W).
- Plug into wall receptacle and operate via inline rocker switch.
🏠 Flushmount Design: Sits flush against the ceiling plate. Ideal for low ceilings (7.5–8.5 ft), entryways, hallways, and walk-in closets.
1
Shut Off Power & Check Ceiling Box
- Turn off circuit breaker. Ensure junction box supports 15–20 lbs.
2
Mount Ceiling Base Plate
- Fasten metal base plate directly to ceiling box using mounting screws.
3
Direct Wiring Inside Canopy
- Connect short leads: Black to Black (Live), White to White (Neutral), Ground to Ground screw.
- Tuck all connectors safely into the internal ceiling cavity.
4
Mount Rattan Shade & Bulbs
- Align shade mounting holes with base plate tabs. Tighten finials firmly.
- Screw in recommended E26 LED bulbs and restore power.
🌾 Lampshade Only: Fits standard E26/E27 pendant cord sets or lamp bases with threaded collar ring (diameter 1.5″–1.65″ / 40–42mm).
1
Verify Your Existing Socket Ring
- Ensure pendant cord socket has an unscrewable plastic/brass collar ring.
- Turn off power to the cord before touching.
2
Unscrew Socket Collar
- Twist counter-clockwise to remove existing threaded ring from your socket.
3
Slide Rattan Shade Over Neck
- Pass top metal spider ring of rattan shade over the threaded socket body.
4
Lock Firmly with Ring & Add Bulb
- Screw collar ring back on clockwise, tightening firmly against shade rim.
- Insert an LED bulb (≤ 60W). LED runs cool, protecting rattan fibers for 10+ years!