
Taking down a chandelier is a key task when you need to change an old light or fix a ceiling. Because these fixtures have a lot of weight and are linked to live power, you must handle them with care to stop any damage to your home.
This guide shows how to cut the power and move the fixture in a safe way. By following these simple steps, you make sure the ceiling wires stay ready for when you set up a new light.
How to Remove Your Chandelier?
Tools & Materials
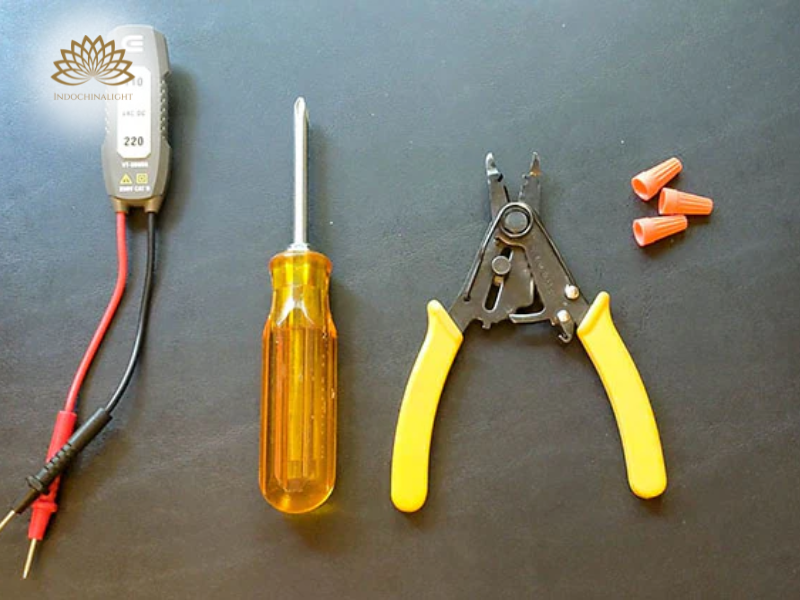
You need these 6 essential tools and materials to take down a chandelier safely. Gather everything before you start to make sure the work goes well:
-
1. Non-contact voltage tester
-
2. Flathead screwdriver
-
3. Phillips screwdriver
-
4. Wire caps
-
5. Soft cloth or drop cloth
-
6. Stable ladder
Having necessary tools ready before you begin will help make the process smooth, safe, and damage-free.
Step-by-Step Instructions
Ask someone to help support the chandelier if it is too heavy or large!
Step 1: Prepare the Area and Turn Off Power
To begin taking down the fixture, spread a drop cloth or padding on the floor under the chandelier to keep the surface safe. Move to your fuse box and flip the switch for that room to the OFF position. Check that the light switch in the room is also off as an extra safety step.
Note: Always use a non-contact voltage tester to check if power is still flowing before you touch any metal parts.

These images will serve as a visual guide during reinstallation or when assembling a new fixture.
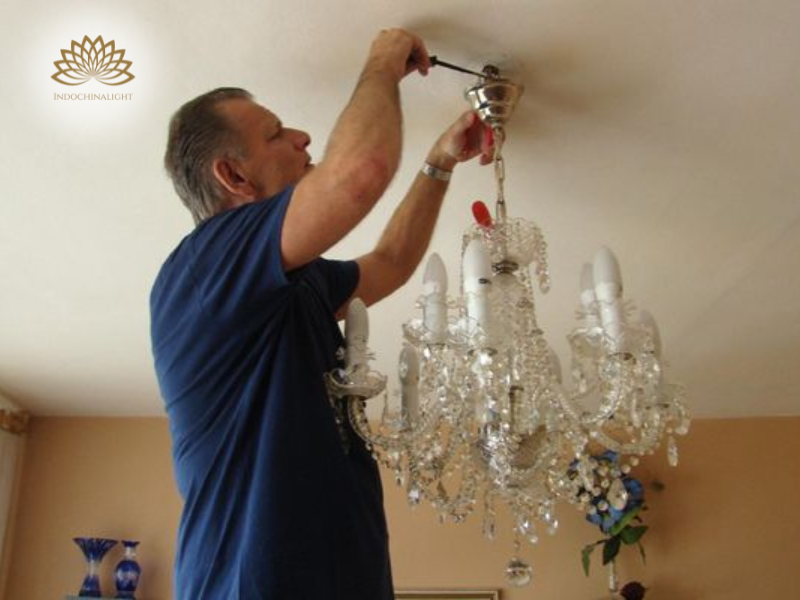
Step 2: Open the Ceiling Cover
Once the power is off, hold the weight of the chandelier with 1 hand to keep it steady. Unscrew the screws that join the cover to the ceiling with your other hand. Lower the cover slowly to show the junction box and the wires inside.
Tip: Ask a friend to hold the fixture while you use both hands to turn the screws faster.

Before removing your chandelier, turn off the circuit breaker, confirm power is off with a voltage tester, and label the breaker to prevent accidental reactivation.
Step 3: Unplug the Wiring
With the wiring now shown, test the black (hot) wire using your non-contact voltage tester to make sure it is dead. Twist off the wire nuts to unplug the chandelier wires from the house wires. Pull the wires apart and keep the ceiling wires straight and organized.
Note: If the tester lights up or beeps, the line is still live; stop work and find the right switch at the fuse box immediately.
Step 4: Take Down the Chandelier
After the wires are free, unscrew any remaining bolts that hold the chandelier to the mounting bracket. Lower the fixture carefully and set it down on your padded cloth. Put wire caps on the open house wires to keep the ceiling box safe until you put in a new light.
Tip: Wrap the bare ends of the house wires with electrical tape before adding the wire caps for a tighter, safer fit.
Loosen the ceiling canopy to access the junction box, carefully disconnect the chandelier's wires while noting their connections.
Safety Notes for Chandelier Removal
Before you start or handle any electrical parts, keep these 3 safety tips in mind to make sure the removal goes well:
-
1. Always use a non-contact voltage tester to check for power before touching any wires.
-
2. Call a pro for too large and heavy chandeliers, or if the wiring looks old or hard to understand.
-
3. After moving the light, neatly organize and fix any remaining ceiling wires to make future work easier and safer.
For more detailed instructions and tips for safely on removing light fixtures, check out our Step-by-Step Guide to Removing a Light Fixture.
Frequently Asked Questions about Removing a Chandelier
Do I Need an Electrician to Remove a Chandelier?
Simple setups allow for DIY removal with basic tools. An electrician is required for complex wiring, outdated systems, or heavy chandeliers to ensure safe and compliant work.
For those planning to install a new chandelier after removal, learn more about the pricing to install a chandelier.
Is It Safe to Remove a Heavy Chandelier Alone?
No, heavy fixtures (over 9 kg) pose a risk of falls and injuries. Use a helper and ensure your ladder is stable and the power is off before starting.
What Should I Do with the Chandelier after Removal if I Plan to Store It?
-
Remove all light bulbs, crystal pendants, and glass shades to prevent breakage.
-
Wipe down all surfaces to remove dust; let dry completely.
-
Wrap each component individually in bubble wrap or soft cloth.
-
Place wrapped parts in a sturdy, padded box; label with contents and date.
-
Store in a cool, dry location away from sunlight and moisture.
Conclusion
Removing an old chandelier is straightforward when you follow the right steps. This guide provides clear instructions for preparation, removal, and safety, allowing you to remove your fixture without damaging the ceiling or risking injury.
For more lighting options, explore IndochinaLight’s collection of handcrafted pendant lights and chandeliers. Discover installation tips and tutorials to make your home projects easier.
IndochinaLight - IndochinaHomeDecor LLC
-
Address: 30 N Gould St Ste. N, Sheridan, WY 82801
-
Phone: (+)1 307 249 0594
-
Email: service@indochinalight.com
-
Website: https://indochinalight.com
Explore other article about the Chandelier:
-
What Is a Chandelier? How It Differs from a Pendant Light


